
Custom Resolution Utility (CRU)
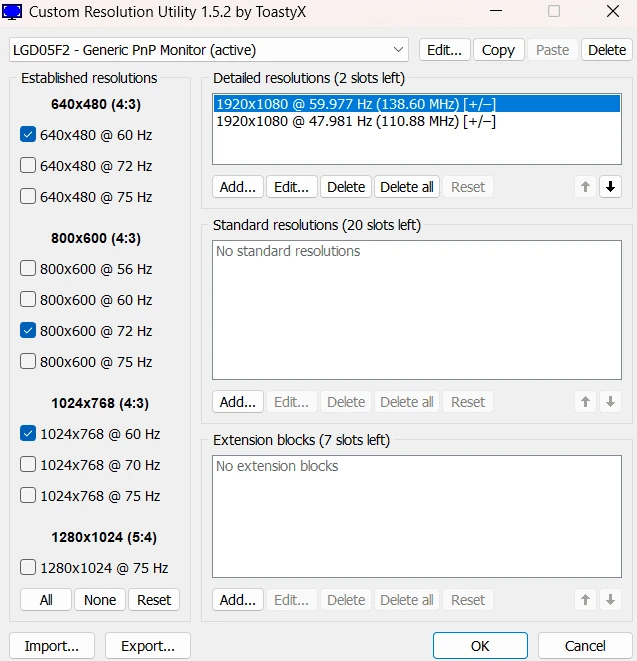
Custom Resolution Utility (CRU) is an Extended Display Identification Data(EDID) editor to customize your screen’s resolution settings. It shows you how your monitor’s resolutions are set up and how you can make changes, like adding new resolutions, removing ones you don’t need, and adjusting FreeSync settings. It works with AMD and NVIDIA graphics cards, and with Intel GPUs when the right driver is installed, making it a helpful tool for many users.
What is Custom Resolution Utility?
The Custom Resolution Utility (CRU) is a small tool for creating custom or high display resolutions and refresh rates in Windows. Developed by ToastyX, it helps control the display visuals of connected monitors. With this tool, you can access hidden resolutions that might be supported by your monitor or GPU but are not visible in standard Windows settings. By creating custom profiles, you can unlock higher resolutions or refresh rates, optimizing your setup for high-definition displays or ultra-wide monitors.
Additionally, CRU adjusts refresh rates, particularly for gamers or those wanting to lessen eye strain from long hours of screen time. CRU not only improves visuals, but you can also use it for better display quality and control by fixing common screen issues like flickering incorrect screen size, or problems with certain graphics cards. By adjusting display settings, your monitor shows a stable, clear picture.
Key Features
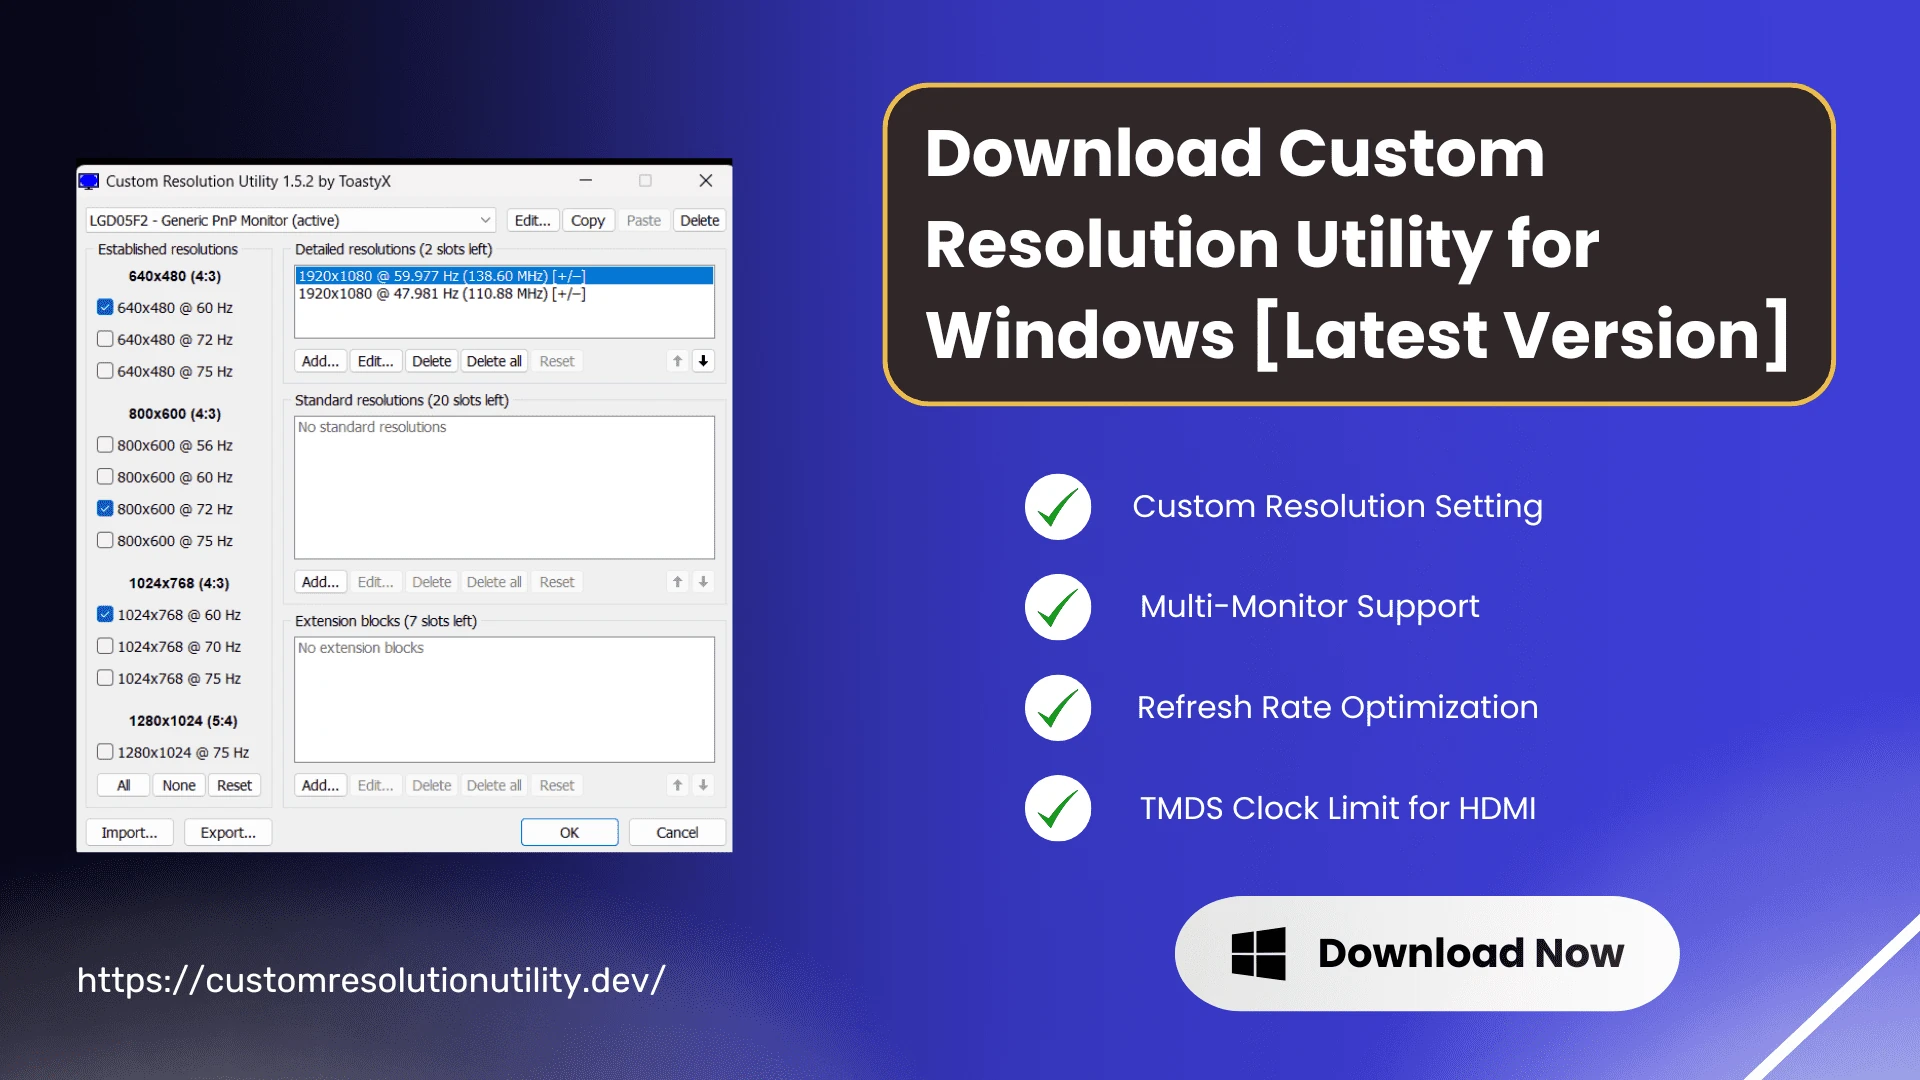
Download Custom Resolution Utility for Windows [Latest Version]

Custom Resolution Utility || v1.5.3 || 533 KB
Minimum System Requirements
The minimum system requirement for custom resolution utility download is:
Operating System: Windows Vista to Windows 11 (Windows XP doesn’t support EDID overrides).
Graphics Card: An AMD/ATI or NVIDIA graphics card with the correct driver installed (the Microsoft Basic Display Adapter driver won’t work).
Intel Graphics: Intel GPUs and laptops with switchable graphics are supported if you have the right drivers:
- For newer Intel GPUs, use the latest drivers.
- For 6th generation (Skylake) Intel, use the Intel Graphics Driver for Windows [15.45].
- For the 4th/5th generation (Haswell/Broadwell), use the Intel Graphics Driver for Windows [15.40].
- For the 4th generation (Haswell) on Windows 7/8.1, use the Intel Graphics Driver for Windows 7/8.1 [15.36].
- Older Intel GPUs only support external displays using a different method.
How to Download and Install CRU on Windows? [Complete Guide]
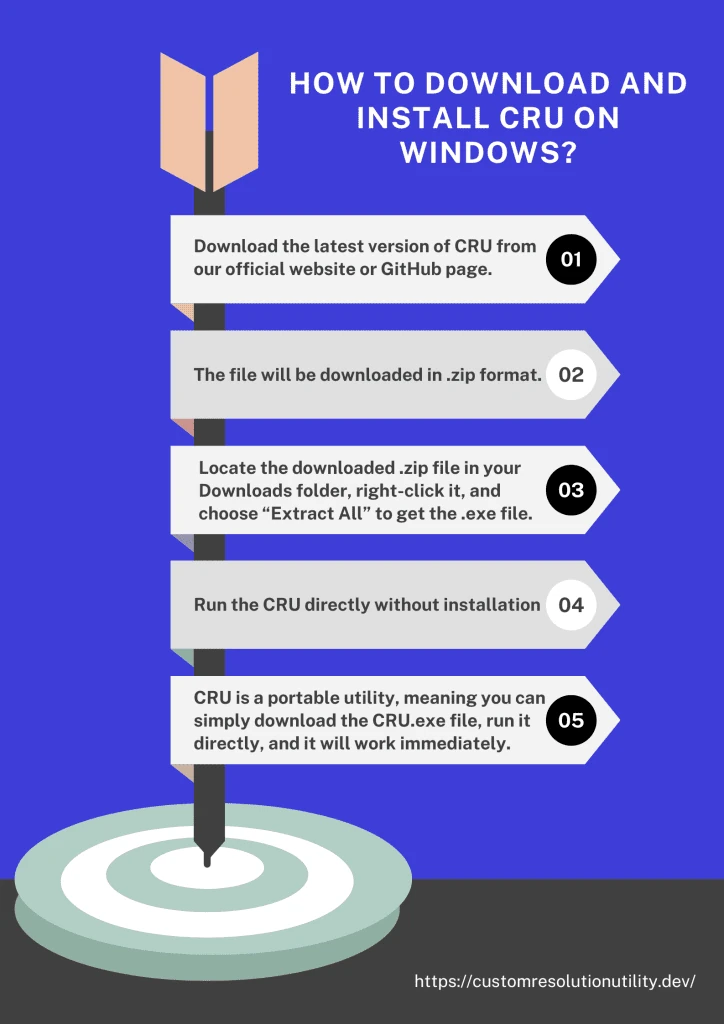
To download and install Custom Resolution Utility for Windows, follow these steps:
- You can download the latest version of CRU either from our official website or you can download it from the Monitor Tests website.
- The file will be downloaded in .zip format.
- Locate the downloaded .zip file in your Downloads folder, right-click it, and choose “Extract All” to get the .exe file.
- Now, you can run the CRU directly without installation, as it doesn’t require installation.
- CRU is a portable utility, meaning you can simply download the CRU.exe file, run it directly, and it will work immediately. You can use it conveniently from any storage device, like a USB drive, for on-the-go display adjustments on different Windows systems.
Features in Detail
Custom Resolution Settings
With Custom Resolution Utility, you can surpass standard resolution limitations by adding new resolutions to suit specific needs. This flexibility benefits you in aiming for unique display configurations or higher resolutions that are not provided by default, particularly improving visuals on high-definition or ultra-wide monitors.
Refresh Rate Optimization
Users can fine-tune refresh rates for smoother performance, crucial for gaming and graphic work. Adjusting refresh rates beyond default settings, you can minimize screen tearing and stuttering, enhancing visual experience and increasing responsiveness during fast-paced activities.
Color Format & Bit Depth Options
You can edit the color capabilities your monitor reports to the graphics driver. In supported CTA-861 or DisplayID data blocks, you can change advertised color formats such as RGB and YCbCr (where available), along with supported color depth capabilities such as 10-bit. Keep in mind this does not change the actual colors on your screen or force a specific output mode.
Multi-Monitor Support
CRU makes configuring custom settings for multiple monitors straightforward, enabling us to extend our workspace efficiently. With multi-monitor support, you can set unique resolutions, refresh rates, color profiles for each screen, and multi-display setup for gaming or productivity.
User-Friendly Interface
It has an intuitive interface, making controls very straightforward, and you can easily add, modify, and apply custom resolutions and refresh rates without the need for extensive technical knowledge.
TMDS Clock Limit Compliance
In CRU, AMD/ATI and Intel drivers follow the TMDS clock limit found in the HDMI support data block to stay compatible with connected hardware. This clock limit sets a maximum resolution and refresh rate to operate HDMI displays safely within their limits.
HDMI as Single-Link DVI
In CRU, HDMI connections work like single-link DVI by default, which limits advanced HDMI features. To unlock these features, you can add an HDMI support data block in CRU. This allows for higher resolutions, better colors, and support for HDMI-specific features.
Graphics Card-Dependent HDMI Limits
The HDMI limits, such as maximum resolution and refresh rate, depend on the graphics card specifications. Some cards may support higher bandwidth over HDMI for higher resolutions, while others have stricter limitations, meaning compatible settings may vary by device.
DisplayPort to HDMI Adapter Limits
Passive DisplayPort to HDMI adapters have a maximum clock rate of 165 MHz, which restricts the resolutions you can set with this Resolution Utility (CRU). This limitation means you might only be able to configure lower resolutions. To achieve higher resolutions or refresh rates, you may need a driver patch or consider using an active adapter that can support these features.
Preferred Resolution Selection
In CRU, the first detailed resolution you set becomes the default or preferred resolution. This means your chosen resolution will automatically be used as the main display setting to set up your preferred screen configuration.
Adjusting FreeSync / Variable Refresh Rate
CRU lets you change your monitor's FreeSync (VRR) range. By editing the range limits in the EDID, you can set the lowest and highest refresh rates used for variable refresh rate. A wider range may help make games look smoother, reduce screen tearing, and improve performance at lower frame rates if your monitor supports it. The settings you need depend on whether your monitor is connected with DisplayPort or HDMI. Every monitor has its own hardware limits, so results can be different. This gives you an easy way to fine-tune how your monitor uses VRR.
Getting Started – How to use Custom Resolution Utility?
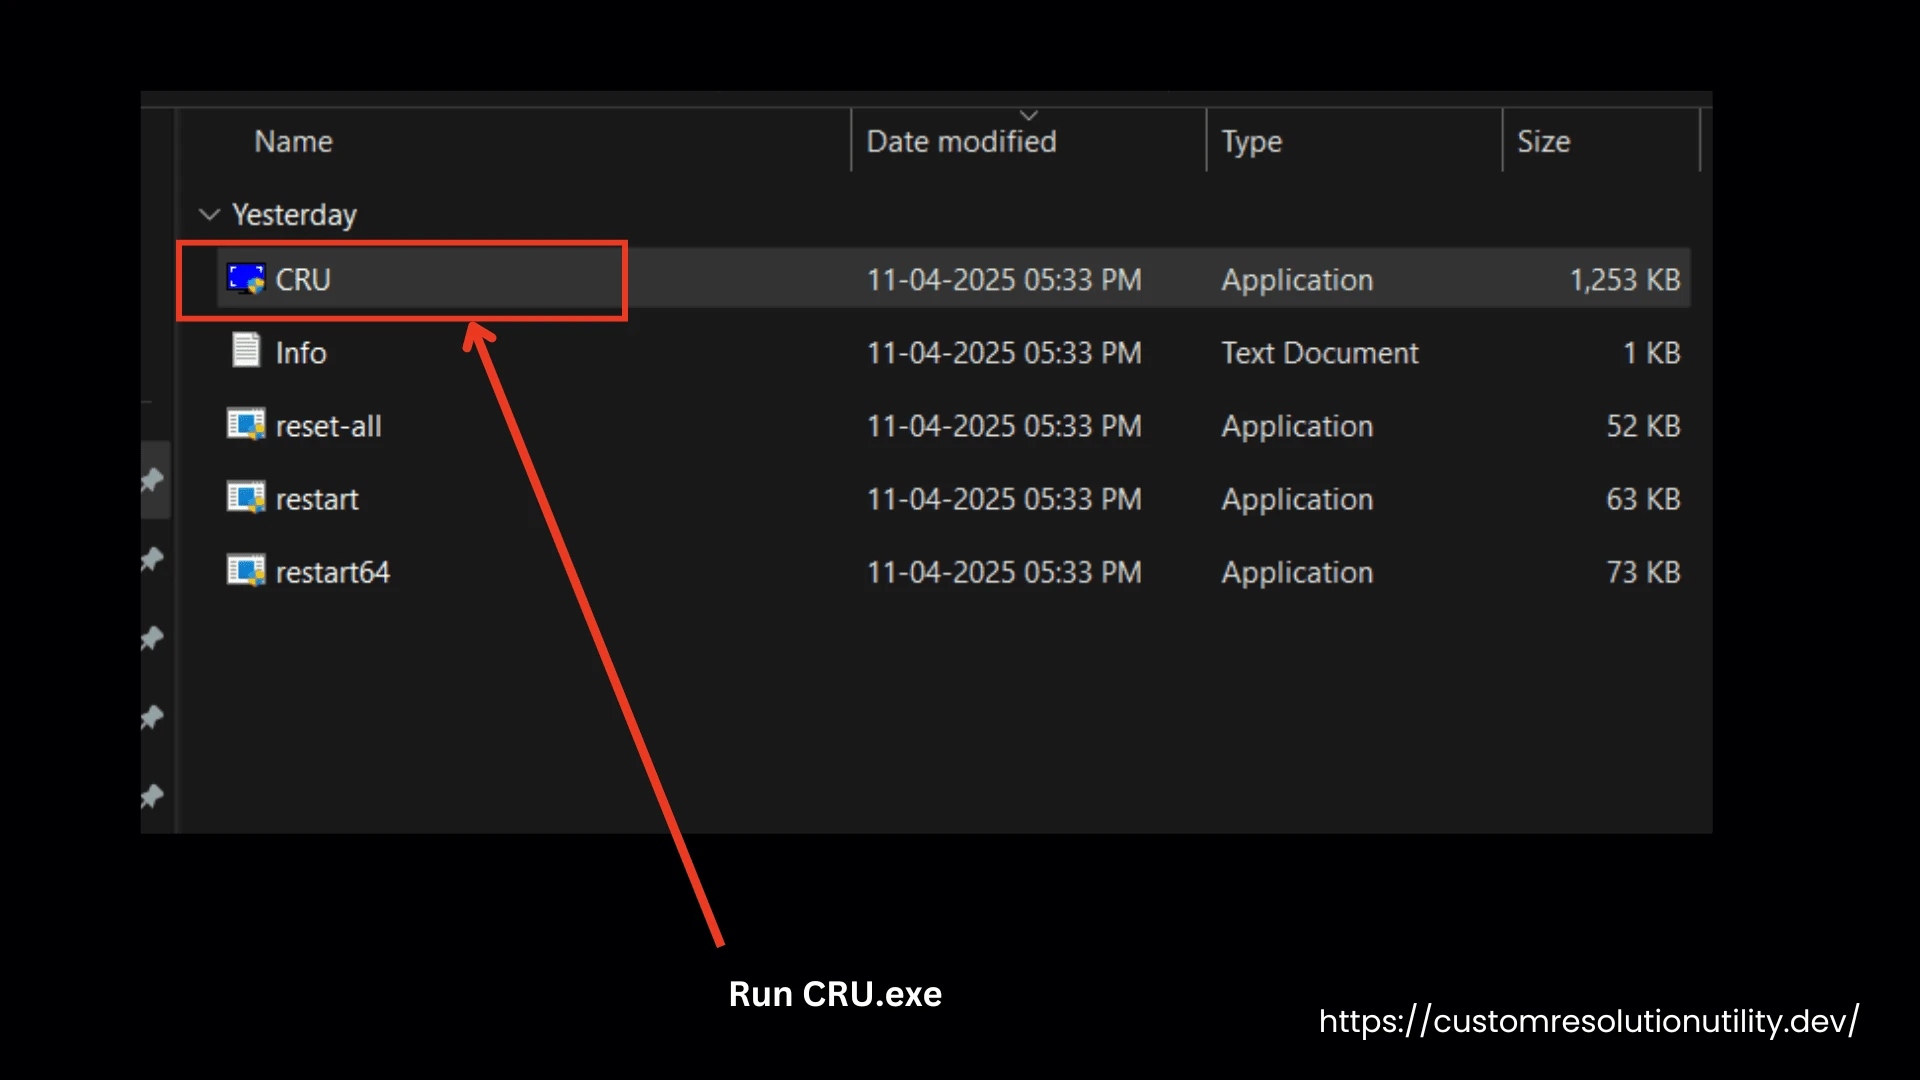
- Run CRU.exe: Upon running the CRU.exe downloaded file, a User Account Control (UAC) prompt will ask permission to access the registry.
- Select Your Display: Select a display from the drop-down menu. “Active” indicates that the display is connected and recognized, while an asterisk (*) shows that modifications were made and saved.
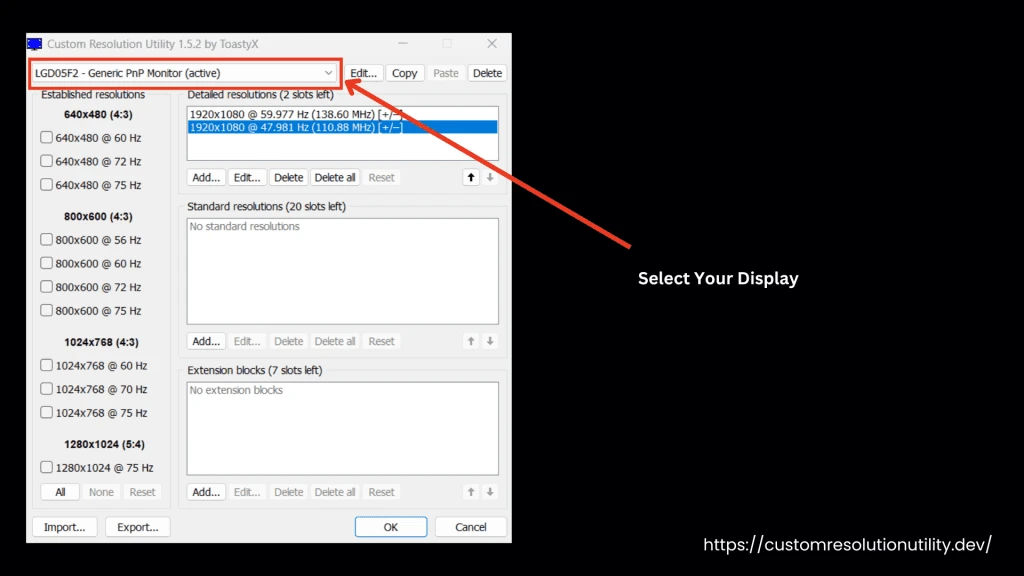
- After selecting a display, a drop-down menu showing different resolutions will appear on the left side. Then, select the “None” button at the bottom.
- On the right side of the same page, you will see the Extension Block (CTA-861) section (6 slots remain). As you select the extension, four tabs will appear at the bottom, choose the Edit option.
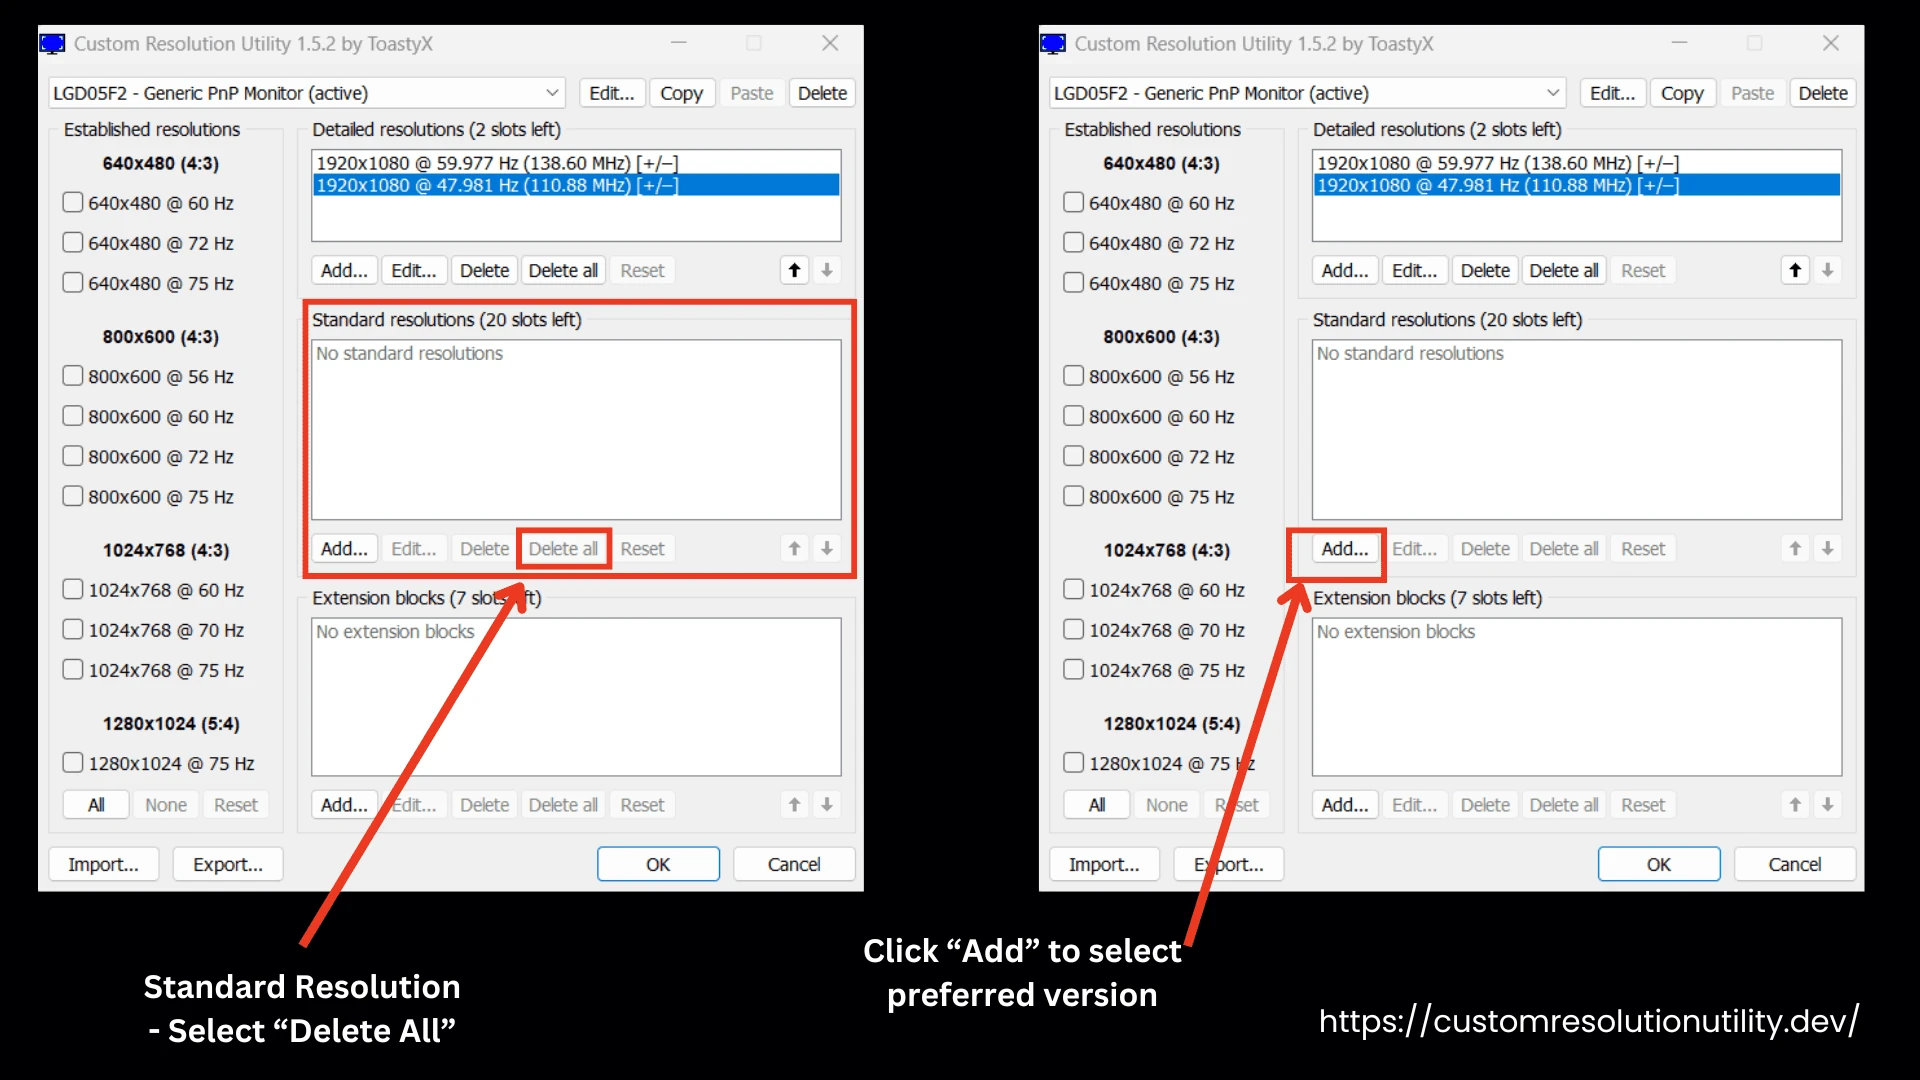
- The Standard Resolution block will open. Then, choose Delete All.
- Next, click on the Add option and select your preferred resolution. Don’t change the refresh rate, then click OK.
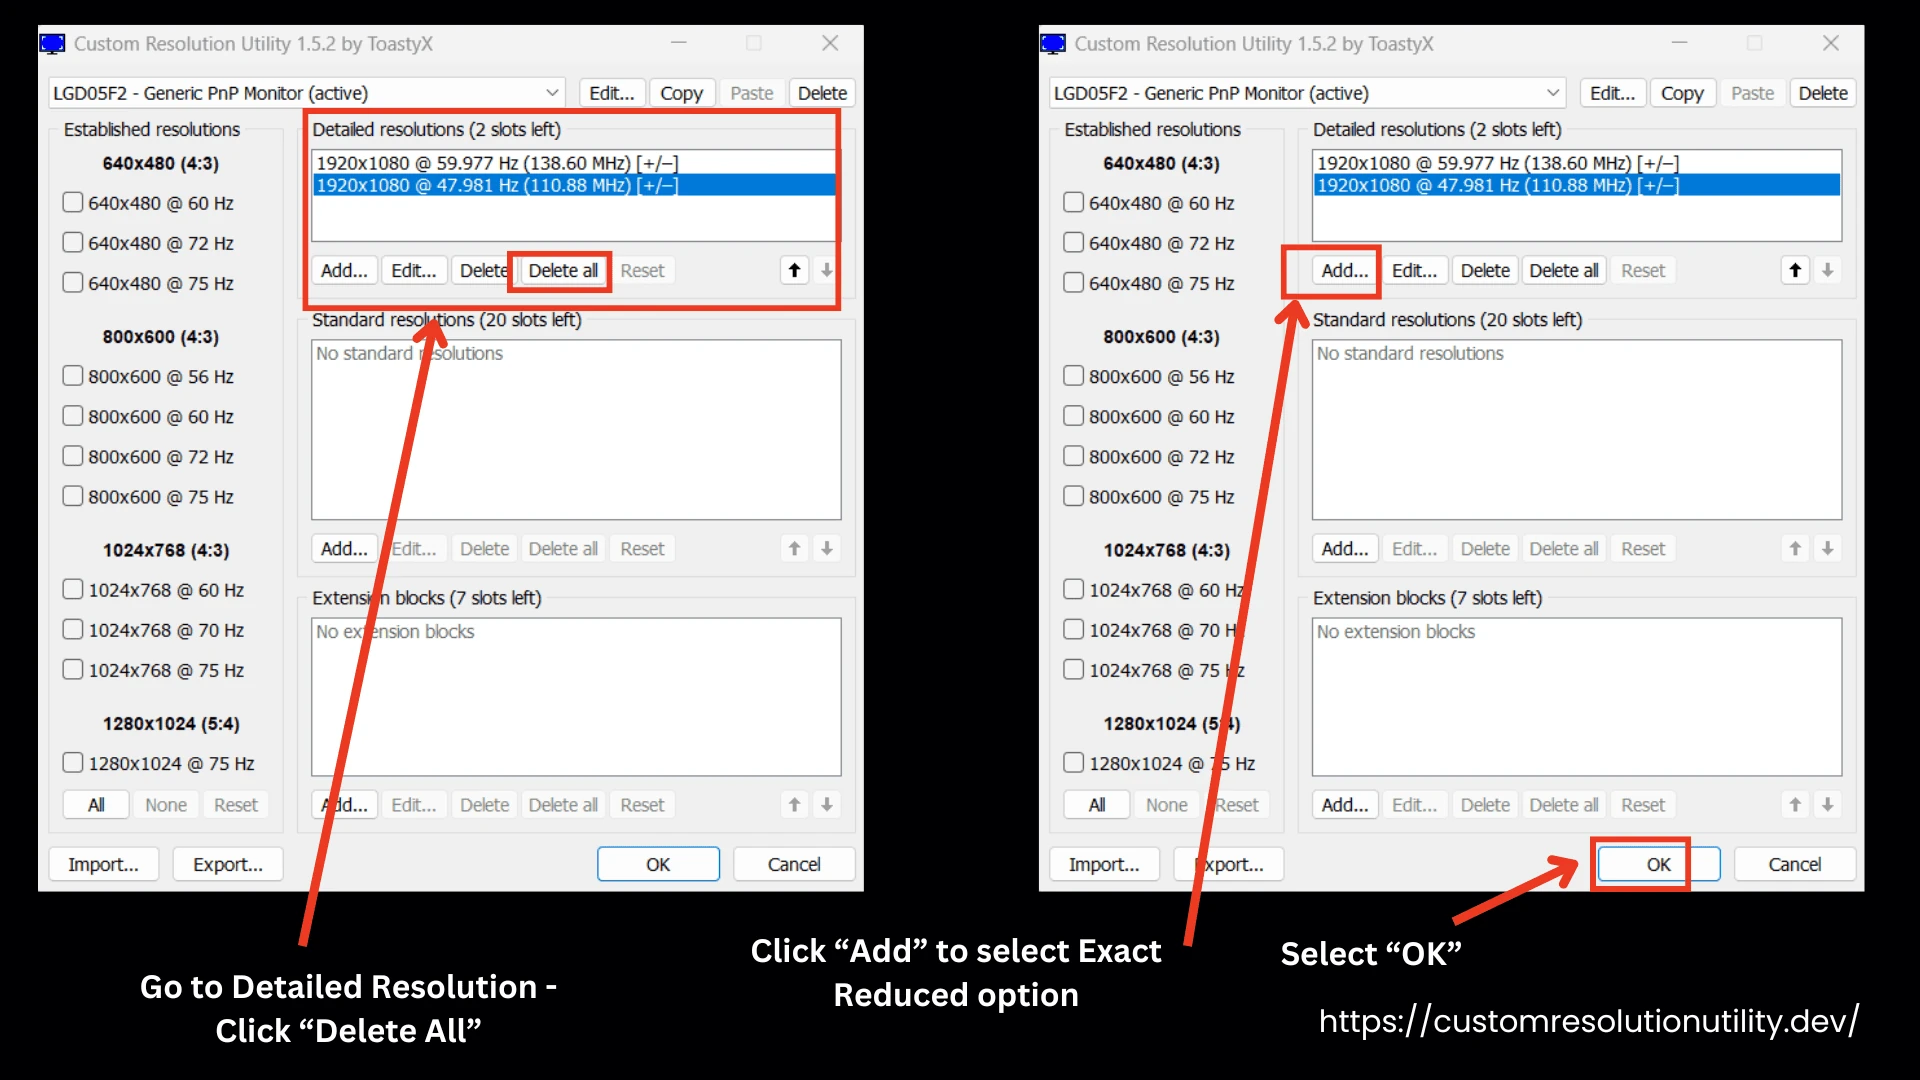
- Go to the Detailed Resolution tab and click Delete All. Click on the Add button, choose the Exact Reduced option, and then input your desired resolution in both horizontal and vertical fields. In the lower tab, select your desired frequency (refresh rate), and press OK.
Note: This process will only copy information related to the display, not the display name or serial number.
- Save Changes: by pressing OK.
- Restart the Driver: Run restart.exe to restart the graphics driver. If the display doesn’t return within 15 seconds, press F8 to enter recovery mode, temporarily unloading the EDID overrides. You can restart the driver again to apply changes.
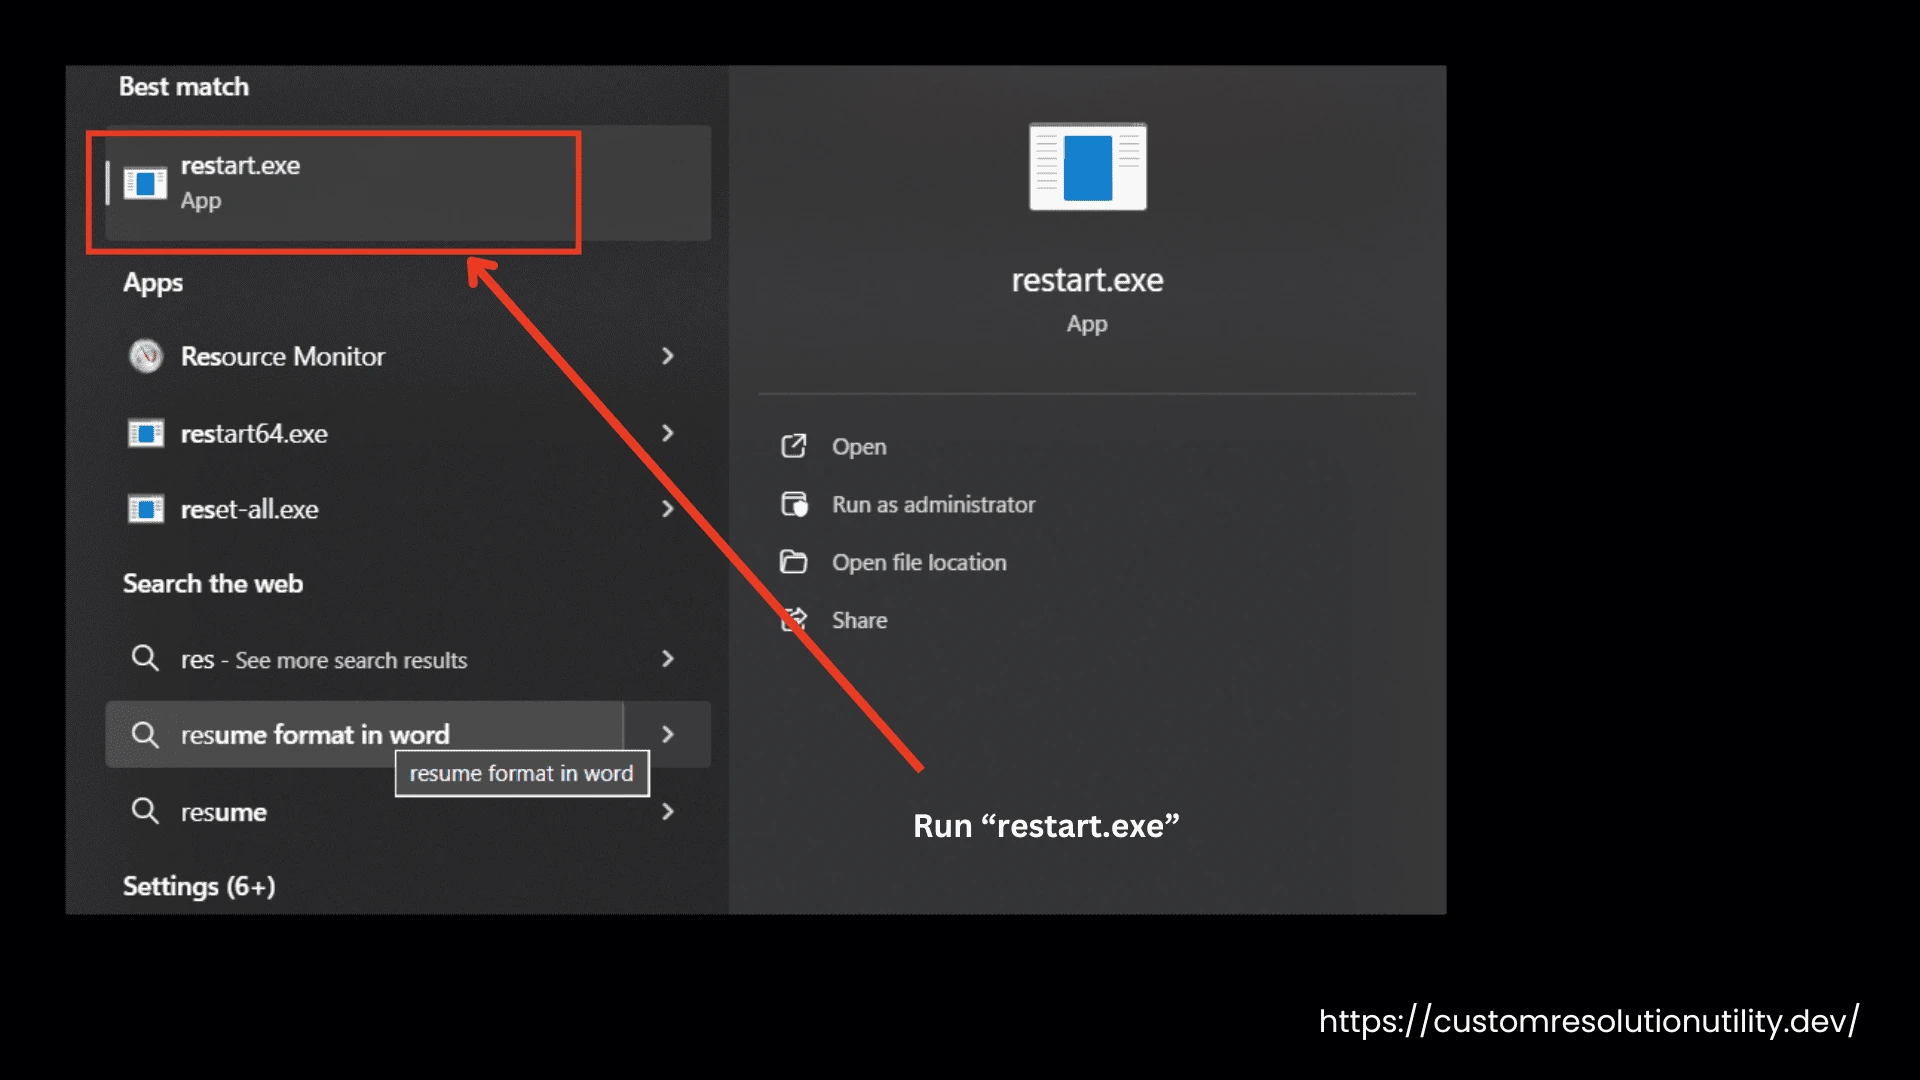
- Handle Driver Issues: If the graphics driver crashes during the restart, run restart.exe again to re-enable it.
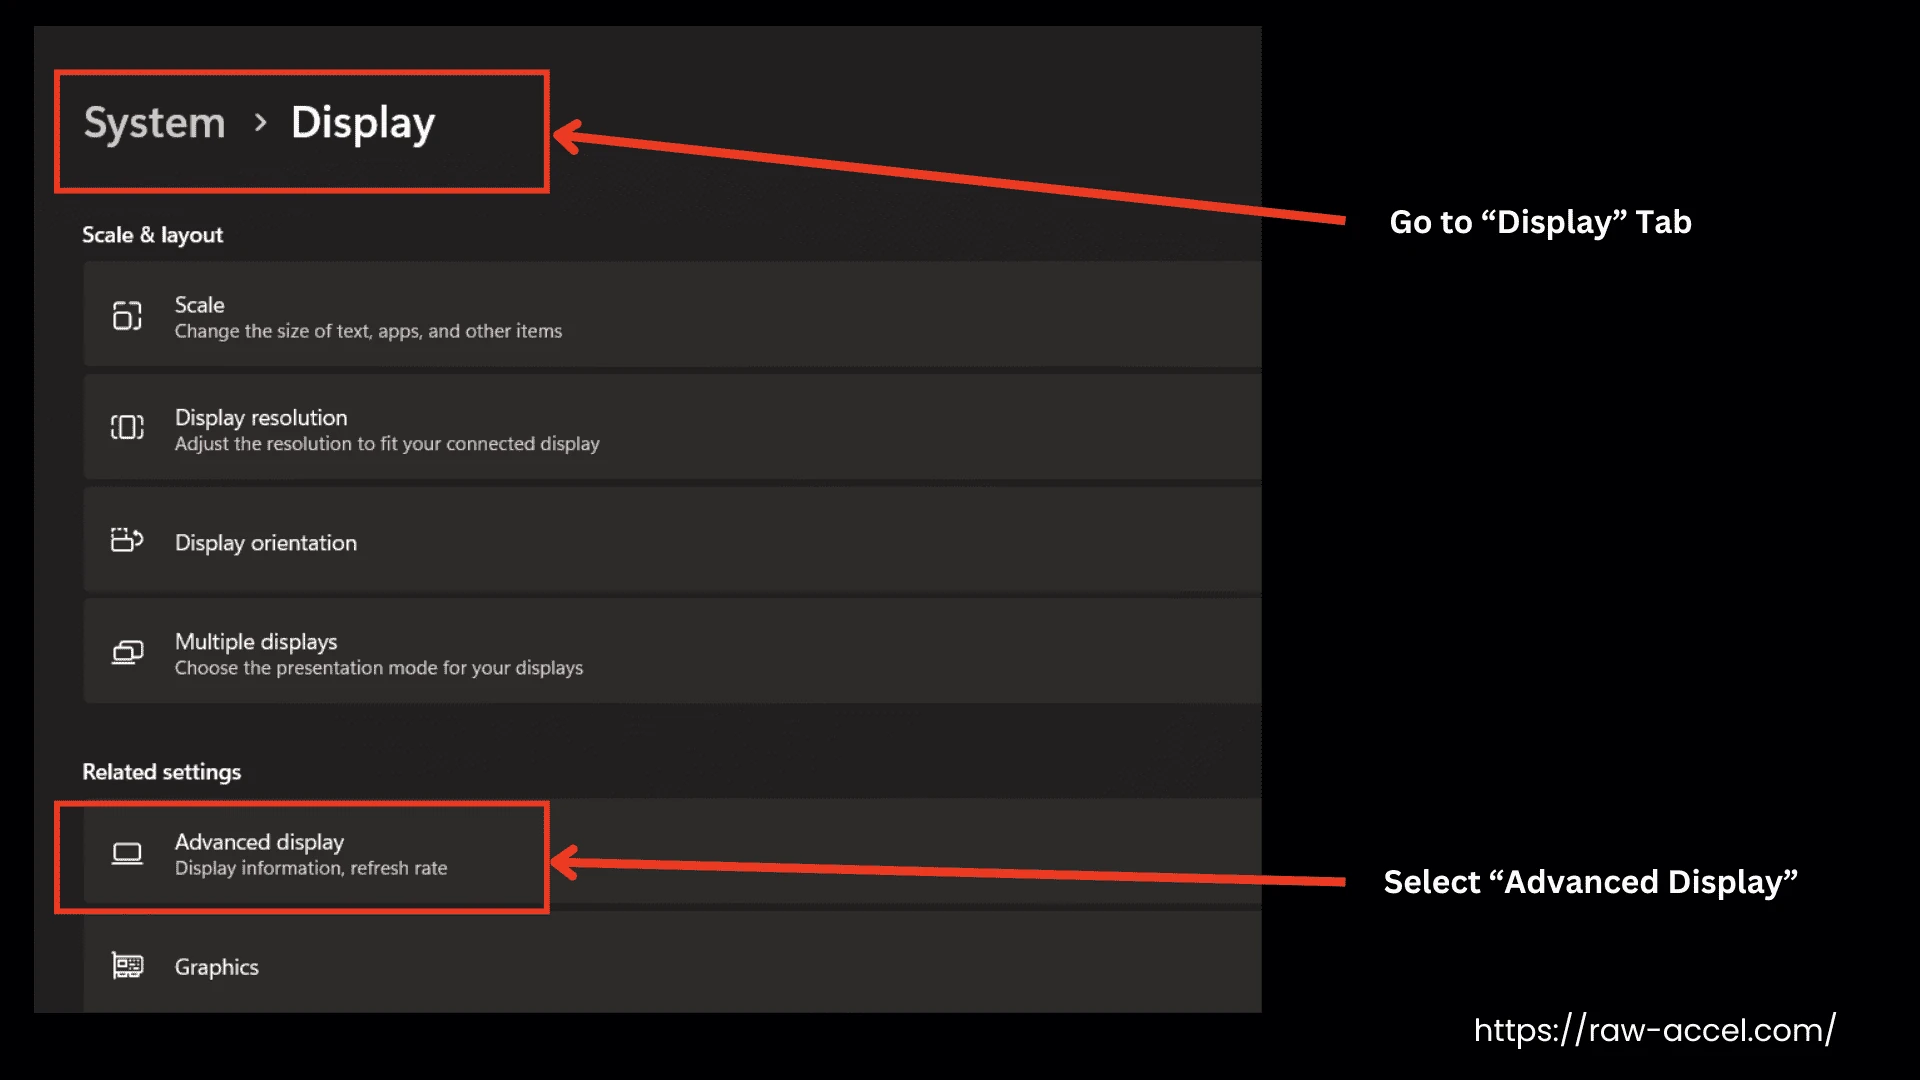
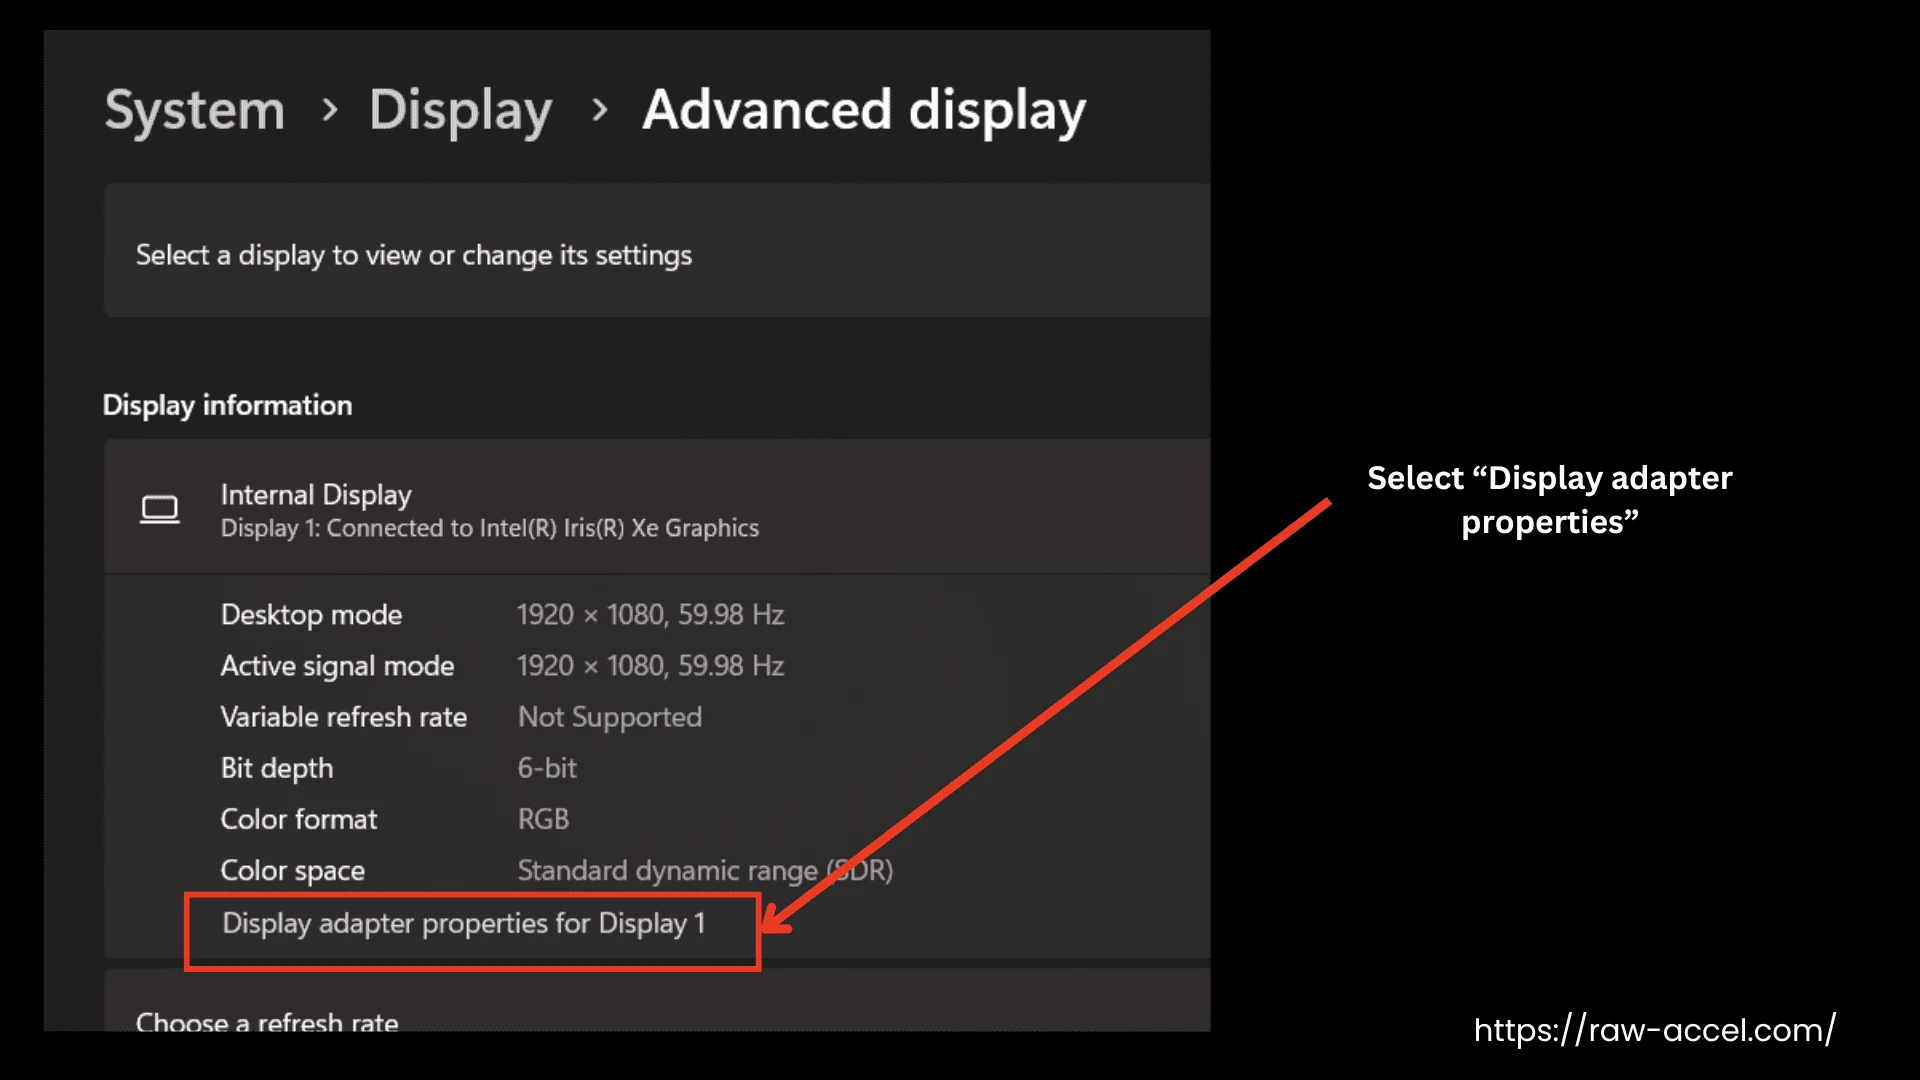
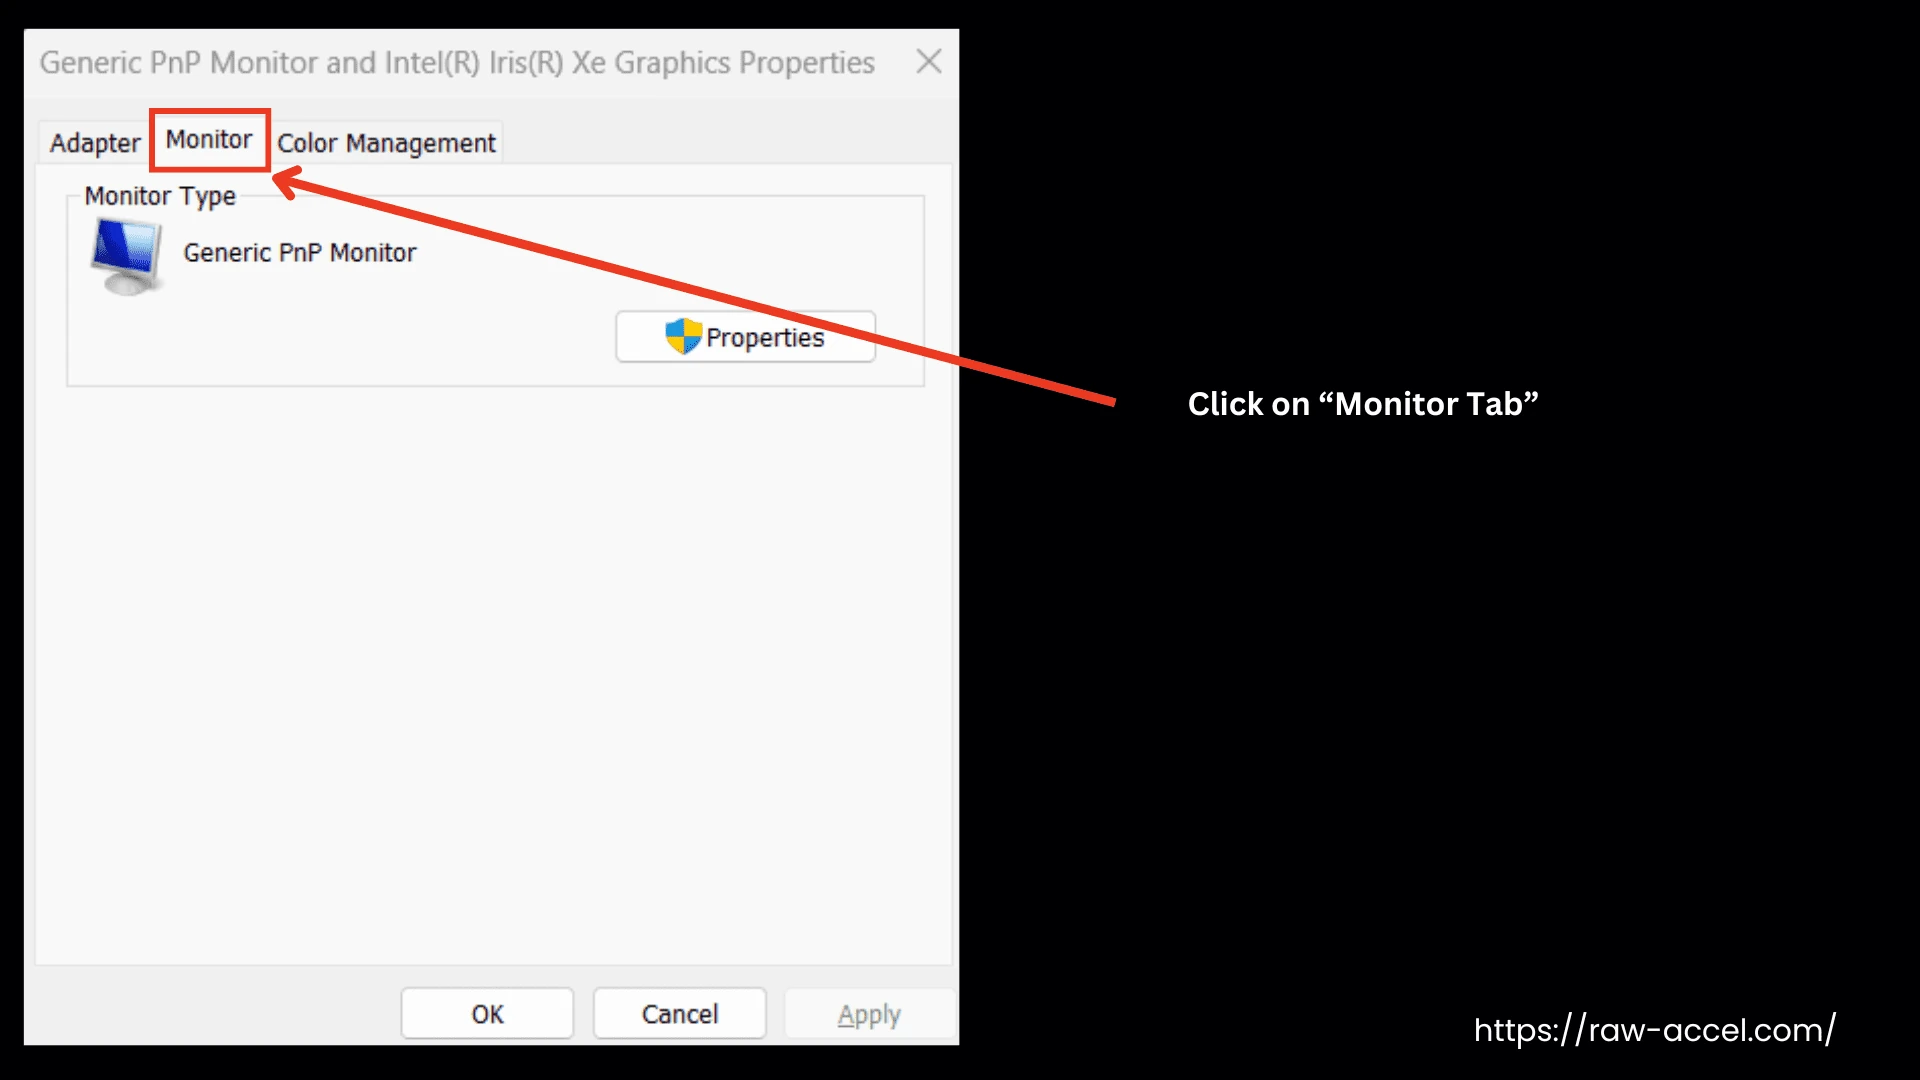
- Set Resolution and Refresh Rate: Go to Windows display settings to set your desired resolution and refresh rate:
- Windows 10: Right-click on the desktop > Display settings > Advanced display settings > Display adapter properties > Monitor tab.
- Windows Vista/7/8/8.1: Right-click on the desktop > Screen resolution > Advanced settings > Monitor tab.
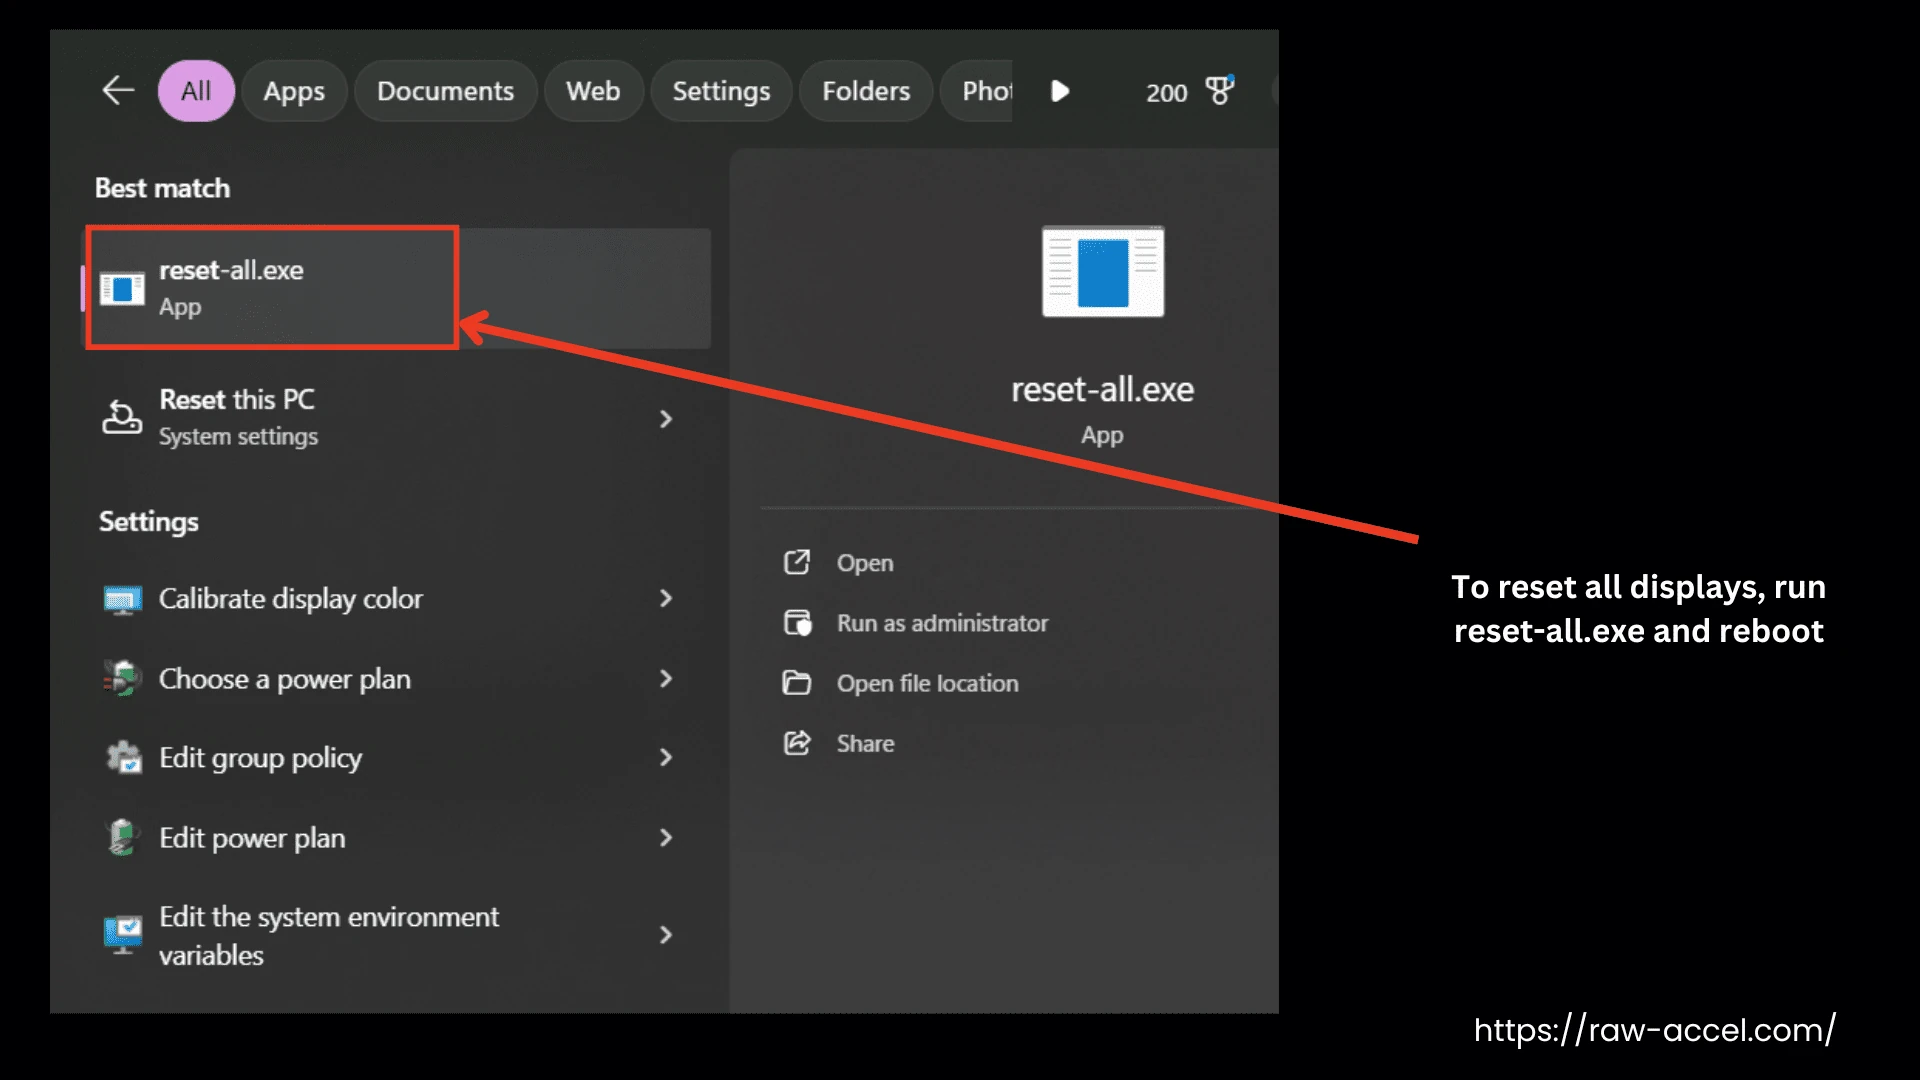
- Reset Display Settings: To reset a display to default, use the Delete button to remove the override from the registry and reboot. To reset all displays, run reset-all.exe and reboot, which can also be done in safe mode if necessary.
Why Choose Custom Resolution Utility (CRU)?
There are many display tools out there, so why go with CRU? For starters, it's completely free with no ads, no sign-ups, and no hidden costs. It's also incredibly lightweight, so it won't slow down your system or take up space. Unlike settings buried deep in your graphics control panel, CRU puts everything in one simple window. It has been trusted by gamers, designers, and everyday users for years, with steady updates from its developer.
One big reason to choose CRU is that it never changes your monitor's real EDID chip. It only saves a software override in the Windows registry, so your monitor's built-in data stays untouched and safe. This makes every change fully reversible. You also get everything in one tool, instead of jumping between separate AMD, NVIDIA, and Intel control panels. And if a setting ever goes wrong, CRU includes a recovery option (press F8) that safely loads Windows without the override, so you are never stuck with a black screen.
| Feature | Best Choice CRU (Custom Resolution Utility) |
NVIDIA Control Panel | AMD Software: Adrenalin |
Intel Graphics Command Center |
PowerStrip |
|---|---|---|---|---|---|
| Free | ✓ | ✓ | ✓ | ✓ | ✕ |
| Create Custom Resolutions | ✓ | ✓ | ✓ | ✓ | ✓ |
| Edit EDID (Software Override) | ✓ | ✕ | ✕ | ✕ | Partial |
| Edit Detailed Timing Parameters | ✓ | Limited | Limited | Limited | ✓ |
| Multiple Timing Standards (CVT, CVT-RB, GTF, etc.) | ✓ | Limited | Limited | Limited | ✓ |
| Edit Extension Blocks (CTA-861, DisplayID, etc.) | ✓ | ✕ | ✕ | ✕ | ✕ |
| Edit FreeSync / VRR Range | ✓ | ✕ | ✕ | ✕ | ✕ |
| Edit HDR Metadata | ✓ | ✕ | ✕ | ✕ | ✕ |
| Remove Unwanted Resolutions | ✓ | Limited | Limited | Limited | ✓ |
| Add Non-Standard Refresh Rates | ✓ | ✓ | ✓ | ✓ | ✓ |
| Works with NVIDIA GPUs | ✓ | ✓ | ✕ | ✕ | ✓ |
| Works with AMD GPUs | ✓ | ✕ | ✓ | ✕ | ✓ |
| Works with Intel GPUs | ✓ | ✕ | ✕ | ✓ | Limited |
| GPU Vendor Independent | ✓ | ✕ | ✕ | ✕ | ✓ |
| Registry-Based EDID Override | ✓ | ✕ | ✕ | ✕ | ✕ |
| Requires Display Driver Restart After Changes | ✓ | Usually No | Usually No | Usually No | Usually No |
| Best For | Complete monitor capability editing | NVIDIA users | AMD users | Intel users | Legacy advanced timing control |
FAQs
Conclusion
The Custom Resolution Utility (CRU) is a small utility for Windows users to customize their display settings. It can easily add or remove resolutions and adjust settings. To download Custom Resolution Utility Windows, simply get the latest version from a trusted source (like our website) or directly from the Monitor Tests website, then extract the files and run CRU.exe to begin setting custom resolutions without installation.